
1.Video Overview
There are 2 options for how you can use the Kilo SSL solution:
Single instance solution
In the video tutorial, you will see how to use the Kilo SSL single instance solution.
Multi-instance solution – ready-to-scale with AWS Network Load Balancer and AWS Global accelerator solution
This video tutorial covers all the steps which should be done for the KiloSSL multi-instance setup.
2.Overview
KiloSSL will provide you with an image* of a server which is a web server and SSL certificate management system. Further on we will call it ACM (Automatic Certificate Management server).
You will integrate the ACM quite easily inside your infrastructure and point all your domains to the ACM. The DNS records for your domains should point to the installed ACM server.
Afterward, all requests to your domains will reach the ACM which will proxy requests to the destination you specified as well as signing the response with the relevant certificate.
All the certificates will be automatically renewed until you will remove the domain.
You will be able to add domains via a simple interface or using API.
* As for now the image is only available as Amazon Machine Image (AMI)

Multi-instance related architecture

Architecture for multi-instance Kilo SSL solution includes usage of AWS Network Load Balancer (NLB) and Global Accelerator. (GA)
With Global Accelerator, you are provided with two global static public IPs that act as a fixed entry point to your application, improving availability and optimizes the path to your application.
Network Load Balancer automatically distributes your incoming traffic across EC2 instances in one or more Availability Zones. It monitors the health of its registered targets and routes traffic only to the healthy targets.
All EC2 instances under the same region’s availability zone will exist under the same target group of NLB. You can set up for example 2 instances in Availability Zone “A”, and 2 instances in availability zone “B”. To allow your domains to be configured in DNS using the A-record (using the IP address), you need to have a single IP address that will point requests to NLB. Initially, NLB itself doesn’t allow to have a single entry point IP address, as each NLB’s target group in each availability zone has its own IP. For single IP purposes, Global Accelerator (GA) is used. GA provides 2 IP addresses (you can use any of them during DNS records configuration)
2.2.Install KiloSSL ACM
As for now, the KiloSSL image is available only as an AMI (Amazon Machine Image) however we are working hard to make it available on other popular platforms.
2.2.1.Create Security group
Create Security group
- Go to EC2 dashboard. On the left panel menu, under Network & Security, click Security Groups. In the security groups page, click Create Security Group
- Set Security Group Name and description, e.g. KiloSSL
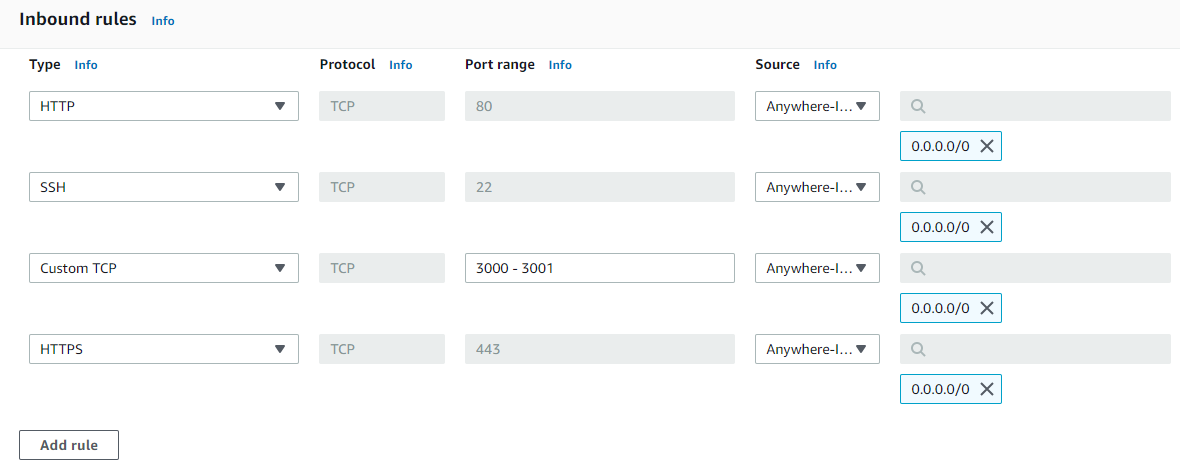
- In the Inbound rules section add the following rules:
- Type: HTTP (protocol is the default here TCP, port 80), Source: Anywhere
- Type: SSH (protocol is the default here TCP, port 22), Source: Anywhere
- Type: Custom TCP, in the port range set value 3000-3001, Source: Anywhere
- Type: HTTPS (protocol is the default here TCP, port 443), Source: Anywhere
- In the Outbound rules section keep the default (Type: All traffic, Protocol: All, Port range: All, destination 0.0.0.0/0
- Press Create Security Group
2.2.2.Single-instance Kilo SSL setup steps
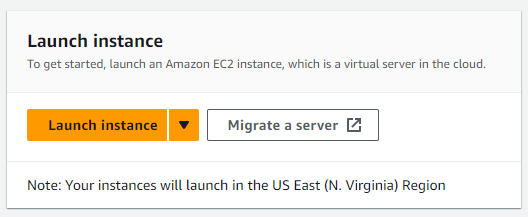
- Go to the EC2 dashboard and press Launch instance button. The Launch an instance wizard will start.
- Set the name of the instance.
- In the Application and OS Images (Amazon Machine Image) section type “kilossl” in the search and press enter.
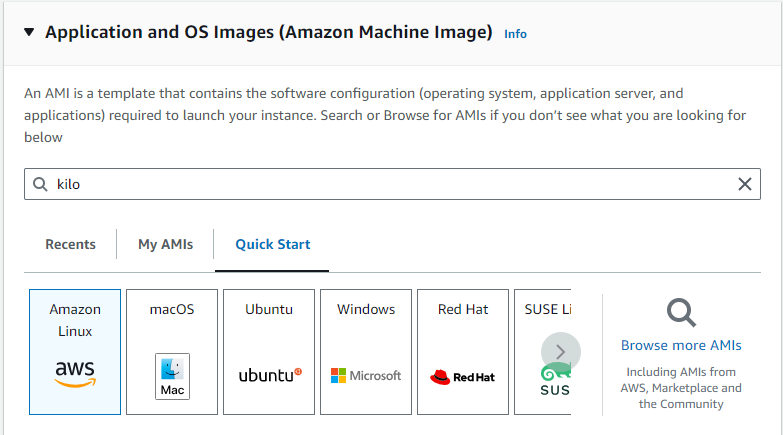
- Choose AWS & trusted third-party AMIs and select Kilo SSL Pro – Multi-Instance SSL Certificate Management server.
- In the Key pair section choose your key for SSH connection to your EC2 instances.
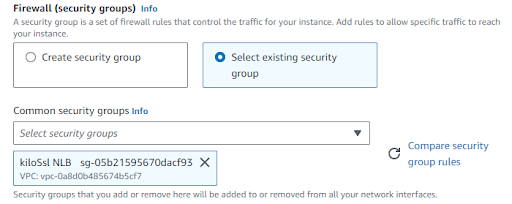
- In the Network settings select your existing security group created before.
- Launch instance.
2.2.3.Multi-instance Kilo SSL setup steps
- Follow steps 1-5 of the 2.2.2. Single-instance Kilo SSL setup steps section.
- In the Summary section, you will be asked to specify the number of the Instances you want to use.
Please Notice: During the process, you can select only one subnet in one Availability Zone for all the instances. So if you want to set instances in different availability zones you’ve to go through the installation for each zone.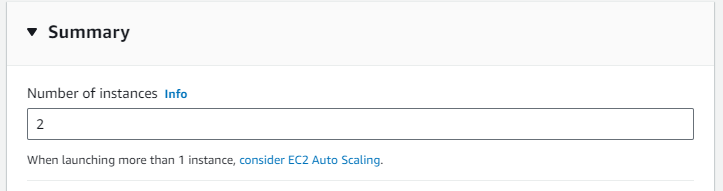
- Launch instance.
3.Perform Initial Configuration
After setting up the ACM machine you will be asked to perform 2 kinds of configuration:
3.1.ACM and your services machines security setting
Securing access via security group
You probably will need to add an additional configuration to your security group which was created before (Inbound and outbound rules set).
-
- For Inbound rules, make port 3000 available ONLY for machines that will be generating the domains via API
- For Inbound rules, make port 3001 available only for machines that require access to the web interface. Web interface might be required in the following cases:
- Initial set up
- ACM monitoring
- Manual domains creation
Example:
Let’s say you want the domains to be created automatically via API from several servers within your network, but you want to grant access to the admin panel only to your admins. And your current web server is hosted outside Amazon. So, the setup we recommend is following:
- Open ACM’s port 3000 for your network IP
- Open ACM’s port 3001 only for admins machines or some network only admins have access to.
- Open port 443 on your service server only for ACM machines.
- Then when you’ll be able to add the endpoint domains in the following manner: add endpointdomain1.com and point it to https://myservices.com/endpoint1 or https://endpoint1.myservices.com or http://:<your service’s IP>:<some port>
Single-instance Kilo SSL setup steps
After the EC2 instance is deployed and running it must obtain a static IP. If you will not perform this step your ACM machine will be getting a new IP every time it is reset. You will use this IP to point your domains/subdomains to this EC2 instance in the future.
3.2.ACM Initial Configuration
3.2.1.Single-instance Kilo SSL setup steps
When all the ports are opened as described previously you can browse the ACM’s admin panel at http://<ACM’s IP or domain>:3001 which you can enter with the default credentials:
login: admin password: use AWS EC2 instance ID as initial password
Update ACM service to the latest version: go to the About page and if any updates available – run Update.
Afterward, you will be able to set the following Settings:
- Admin credentials – here you will be able to edit the admin panel login and password. Please notice that you will not be able to make any changes until updating the default password. While updating the default login is not mandatory, we strongly recommend changing it.
- MySQL settings – MySQL will keep your domains and certificates data.
- LetsEncrypt settings – LetsEncrypt will notify you about different events like the coming domain certificate expiration (in a normal situation you shouldn’t be getting such notifications since KiloSSL will renew the certificate by itself but if you did receive such a notification you should contact our support. This field is mandatory to allow KiloSSL to produce SSL certificates automatically.
- Default destination – allows to set URL of the page to show in the case when some domain already points to ACM machine, but this domain wasn’t added to the list of domains yet.
- API key management – here you will be able to generate an API key to be used to authenticate while using KiloSSL API
- Nginx Configuration
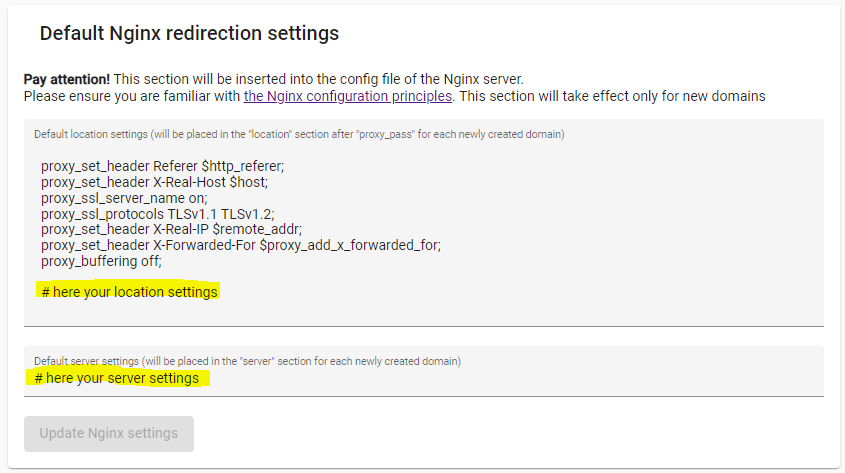
Default redirection settings – when adding a new domain to the ACM’s web server along with the target location where to redirect the request after validating the certificate KiloSSL will also add few settings to take effect during the redirection.
Nging Server Settings – along with Default Nginx Redirect Settings can be used for more precise and personalized Nginx settings. For example, you can specify a log storage file with the access_log and error_log directives.
You will be able to edit all the configurations in the default template (will take effect only on new domains being created) or specifically for each domain on the My Domains page.
Pay attention that the changes are saved directly to the Nginx config file and may affect the web server functioning so before making any change ensure you’re familiar with Nginx Configuration principles.
- CloudWatch settings – Along with the logs KiloSSL produces on the machine itself you have an option to duplicate the logs to your CloudWatch to view them there or even to attach a monitoring system afterward. Letsencrypt will be sending you error notifications to the provided email, even though we strongly recommend enabling this option since otherwise, you won’t have any option to get notified about problems that happened before generating or renewing the Certificate other than entering the machine itself and viewing the logs.
Before saving CloudWatch settings in the Admin panel, you must first create a log group “kilossl-acm” in the AWS CloudWatch region, where logs should be stored.
Then create an AWS user with permissions to write to Cloudwatch and attach the mandatory permissions to this user. The fastest way to do it:
1. Go to AWS console, open IAM Services, Press Add new user
2. Add User Name, choose Programmatic access, Press Next
3. Choose Attach existing policies directly, search for CloudWatchFullAccess and add it to the user
Diving deeper, this created user should have at least these 5 permissions:- CreateLogGroup
- PutLogEvents
- DescribeLogStreams
- PutRetentionPolicy
- CreateLogStream
Mandatory settings
You must set several settings on this page in order to be able to create and manage domains via UI or API. These settings are:
- Admin credentials (due to security reasons we block functionality if you didn’t change the default password)
- MySQL settings – MySQL will keep your domains and certificates data.
- LetsEncrypt Settings – as they are needed for account creation in LetsEncrypt
- Default Destination – we force clients to set this setting as we want our Kilo SSL users to be aware of this option and in almost all cases this should have some value
3.2.2.Multi-instance Kilo SSL setup steps
For multi-instance configuration you should do the steps described above for each EC2 instance. Visit each application UI with an address like http://public_instance_ip:3001 with the default credentials (login: admin, password: AWS EC2 instance ID). And set it up like described in this section above.
Notice: Give the same credentials to MySQL DataBase. If you want to maintain 2 different environments (test, prod), specify a separate DBs for each of them.
Then on the Settings page, you can also configure the time interval for automatic syncing certificates from MySQL DB to your EC2 instances. This is a period within which all the instances will be updated with a newly created or updated SSL Certificate.
By default, the synchronization process is set to run every 30 minutes. Keep in mind that every synchronization causes Nginx restart and creates load on the server. So it is not recommended to set a smaller period. (However Nginx is restarted in a graceful manner, so it won’t cause any downtime for your services)
You can also run the synchronization process manually by clicking the Sync manually button on the settings page. It will automatically start a synchronization process to run on the current instance. This option can be useful when adding a new instance to an existing group of Kilo SSL instances.
If you would like to update the version of KiloSSL on your EC2 instances – you should update one by one on each instance separately.
3.3.Setup Network Load Balancer and Global accelerator
This section describes steps only for Multi-instance Kilo SSL setup
3.3.1.Configure your target group
Open the EC2 dashboard. On the left navigation pane, under Load Balancing, choose Target Groups. You need to create target groups for ports: 80, 3000, 3001, and 443.
- Press the Create target group button.
- Choose the next settings:
- Target type: Instances.
- Target group name: any name, ex. KiloSsl80.
- Protocol: TCP, port: 80.
- Select the VPC containing your instances.
- For Health checks, set the TCP protocol.
- Press the Next button.
- Select the created instances and press Include as pending below button.
- Press the Create target group button.
- Do the same for the 3000, 3001, and 443 ports.
3.3.2.Configure Load Balancer
Open the EC2 dashboard. In the navigation pane, under Load Balancing, choose Load Balancers.
- Press the Create Load Balancer button.
- You need to choose Network Load Balancer
- Choose the next settings:
- Name – any name, ex. KiloSslLoadBalancer
- For Scheme and IP address type, keep the default values.
- Select zones where your instances are. You can see it in the Instances Table, column Availability Zone. For each zone, you select the IP assigned by AWS
- For Listeners and routing choose 80 port, and for Default Actions choose the target group, you created in the previous step for this port (port 80)
- Press Add listener button and do the same for 3000, 3001, and 443 ports.
- Review your configuration, and choose to Create a load balancer.
3.3.3.Test your load balancer
- In the left navigation pane, under Load Balancing, choose Target Groups.
- Select the newly created target groups.
- Choose Targets and verify that your instances are ready. If the status of an instance is initial, it’s probably because the instance is still in the process of being registered. Port 443 will become health status after generating your first domain with certificate.
- In the navigation pane, under Load Balancing, choose Load Balancers.
- Select the newly created load balancer.
- Choose Description and copy the DNS name of the load balancer (for example, my-load-balancer-1234567890abcdef.elb.us-east-2.amazonaws.com). Paste the DNS-name:3001 into the address field of the web browser. If everything is working, the application authorization page will be loaded.
3.3.4.Configure Global Accelerator
3.3.4.1.Step 1: Basic configuration
- Open the Global Accelerator console.
- Choose Create accelerator.
- Provide a Accelerator name for your accelerator.
- For Accelerator type, select Standard.
- For IP address type, select IPv4.
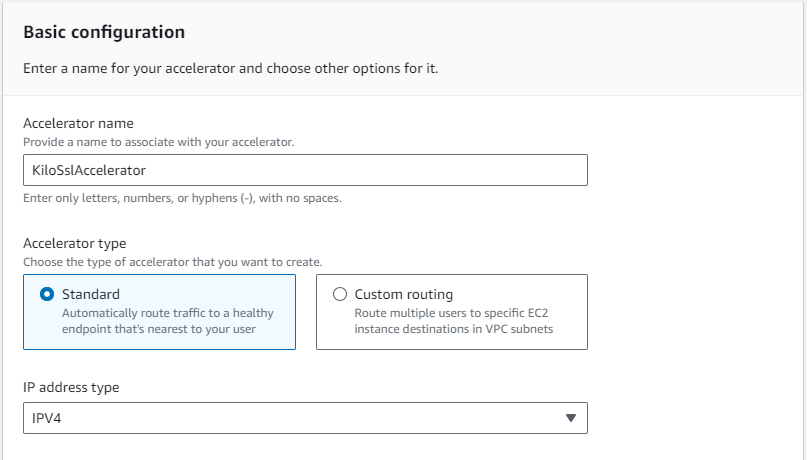
- Choose Next.
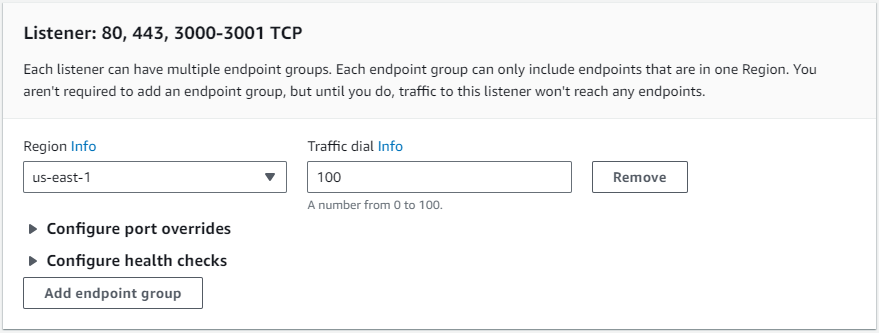
3.3.4.2.Step 2: Add listeners
Create a listener to process inbound connections from your users to Global
- Set Ports: 80, 443, 3000-3001.
- Set Protocol: TCP
- Left Client affinity: None

- Choose Next.
3.3.4.3.Step 3: Add endpoint groups
- Add one or more endpoint groups, each of which is associated with a specific AWS Region.
- Choose Next.
3.3.4.4.Step 4: Add endpoints
- Click Add endpoint button.
- Set Endpoint type: Network Load Balancer
- Set Endpoint: select created Load Balancer
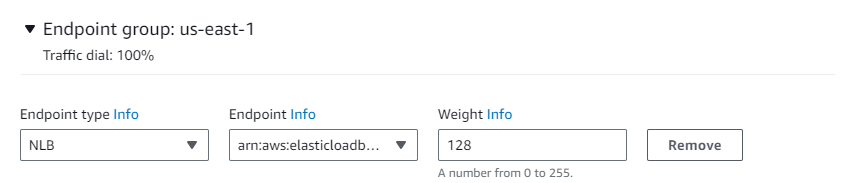
- Choose Create accelerator.
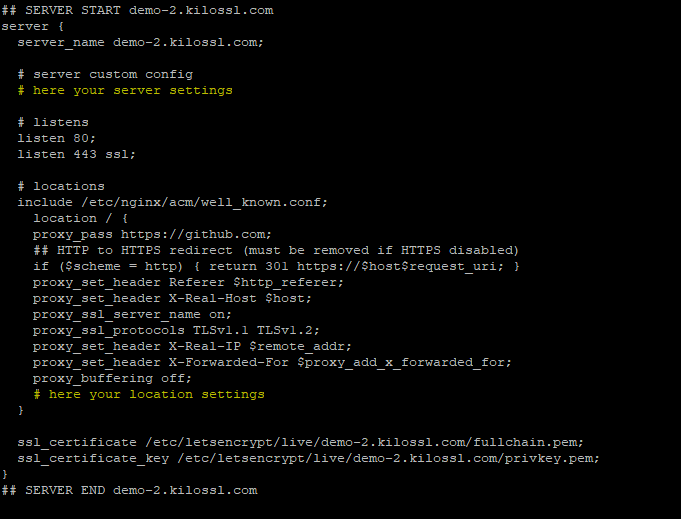
4.Default Nginx Redirection Settings
- proxy_set_header X-Real-Host $host; – this will add X-Real-Host header which will contain the original host of the request since all the request will be redirected to your services via ACM server the host header will contain ACM’s info, so to know the original host of the request you’ll have to use the data from this header.
- proxy_set_header X-Real-IP $remote_addr; – this will add X-Real-IP header which will contain the original IP of the request
- proxy_set_header Referer $http_referer; – this will proxy initial referer header
- proxy_buffering off; – this will disable buffering of responses from the proxied server (as buffering is enabled by default)
- proxy_ssl_server_name on; – this will Enable passing of the server name through TLS Server Name Indication extension when establishing a connection with the proxied HTTPS server. (as this is disabled by default)
- proxy_ssl_protocols TLSv1.1 TLSv1.2; – this will Enable the specified protocols for requests to a proxied HTTPS server. (proxy_ssl_protocols option uses “TLSv1 TLSv1.1 TLSv1.2” as default value)
- proxy_set_header X-Forwarded-For $proxy_add_x_forwarded_for; – NGINX provides a $proxy_add_x_forwarded_for variable to automatically append $remote_addr to any incoming X-Forwarded-For headers.
- One extra setting will be added for every domain which is created with enabled HTTPS. This setting will force all incoming to http:// requests to be redirected to https://. This setting line will be: if ($scheme = http){ return 301 https://$host$request_uri; }
- All other settings will be Nginx defaults
5.Start Using
When all the initial setup is done you can finally start using the KiloSSL. There are few major actions you’ll be able to perform with KiloSSL ACM:
5.1.Limitations
- Each domain will have its own certificate (currently it is not possible to have multiple domains in certificate’s Subject Alternative Names field)
- If API will get several simultaneous requests to create/revoke certificate – it will process such requests one by one in a queue. As it takes several seconds to create each certificate in Letsencrypt, you will be able to create approximately about 10 certificates per minute.
- You can use only 1 API key. If you will create new API key – old API key will stop working immediately. API key is shown only once right after creation. If you will forget API key value – the only option is to create a new one.
- There is an option to update software directly from the site. But using update you can only install the latest existing version of the program. Currently you can’t install back one of the previous versions. On demand, you can contact support in order to get instruction about how to install one of the previous versions.
- There is no option to use staging Letsencrypt environment for test purposes. Check Letsencrypt limitations in order not to meet any rate limits. Here are the limitations which are more likely to be reached
- Only 50 certificates for specific domain can be created per week
- Revoking certificates for the domain does not reset rate limits for that domain
5.2.Adding a Domain
When you add new domain – there are 3 available options for managing SSL:
- create domain with HTTPS support. Before adding the domain to the ACM you must redirect its DNS settings to the ACM via A or CNAME records and while the domain is not redirected you’ll be receiving a Domain not attached (Code=1300) error from KiloSSL. Together with the domain an SSL certificate will be created for the domain and the domain will start being available via https (http requests will be redirected to https). The certificate will be renewed automatically 29 days before its expiration until you delete the domain from the server.
- create domain without HTTPS support (your domain will work only with HTTP, certificate won’t be created)
- create domain and import your own existing certificate (this option available currently only from UI). In order to use your own certificate, you should attach 2 files:
1. The server certificate, which is a public entity. It is sent to every client that connects to the server
2. The private key, which is a secure entity
Under the hood these 2 files will be integrated into nginx configuration likessl_certificate www.example.com.cert;
ssl_certificate_key www.example.com.cert;Certificate for this domain will be renewed automatically when it will be less than 29 days before expiration of imported certificate.
You’ve 2 ways to add a domain:
5.2.1.Adding a domain using Interface
- Browse to your ACM admin panel http://<ACM’s IP address>:3001
- Go to My Domains page in the ACM admin panel
- Press the Add Domain button
- You’ll be asked to provide following information:
- Domain you want to add without http or https prefixes (please notice that you won’t be able to change it after the creation)
- If HTTPS should be enabled (turned ON by default). When this option is active, you are able to see another setting allowing import of an existing certificate
- URL of your service you want the ACM to redirect the request arriving for this domain. It can be http/https, URL containing domain or IP address. Note: If your service is behind https, ACM will ignore any SSL errors (for example if your service uses obsolete or self-signed certificate)
- Also, you’ve an option to change the Nginx redirection settings
5.3.Editing a Domain
After domain is created on the ACM you have a possibility to change it’s targeting URL or/and it’s Nginx redirection settings, both via interface and via API.
If this domain was set previously to work over HTTP only (without a certificate), you will be able to
- enable HTTPS for this domain automatically. This will create new certificate on the server by issuing new certificate from LetsEncrypt
- enable HTTPS by importing your own existing SSL certificate
5.3.1.Editing a Domain using Interface
- Browse to your ACM admin panel http://<ACM’s IP address>:3001
- Go to My Domains page in the ACM admin panel
- Press the Edit icon near the Domain you want to change
- You be able to update following information:
- URL of your service you want the ACM to redirect the request arriving for this domain.
- Also, you’ve an option to change the Nginx redirection settings
5.4.Deleting a Domain
Deleting a domain will also cause removal of its SSL certificate and as well as its periodical renewal. You can delete a domain using interface or an API.
5.4.1.Deleting a Domain using Interface
- Browse to your ACM admin panel http://<ACM’s IP address>:3001
- Go to My Domains page in the ACM admin panel
- Press the Delete icon near the Domain you want to change
5.5.Getting Domains List
You will be able to view a list of all your domains and get the following information for them:
- Domain name
- Current certificate creation date
- Current certificate expiration date
5.5.1.View domains list using interface
- Browse to your ACM admin panel http://<ACM’s IP address>:3001
- Go to My Domains page in the ACM admin panel
6.API Error Codes
| Http Code | Error Code | Message |
| 403 | 403 | Forbidden |
| 404 | 404 | Action not found |
| 500 | 500 | Unspecified error occurred |
| 400 | 1000 | Certbot already running |
| 400 | 1100 | Parameter must have a value |
| 400 | 1101 | Parameter value is invalid |
| 400 | 1102 | Action not available for default password |
| 400 | 1103 | Letsencrypt email is not set |
| 400 | 1200 | Domain not found |
| 400 | 1201 | Domain already exists |
| 400 | 1300 | Domain not attached |
| 400 | 1301 | Can’t create certificate as nginx machine already has this certificate |
| 400 | 1302 | Couldn’t find certificate file after certbot created certificate |
| 400 | 1303 | Couldn’t find certificate file |
| 400 | 1304 | Invalid Nginx configuration |